Best Target for Combat Training | Tactical Rifleman

MGM has agreed to give our Tactical Rifleman viewers a 10% discount; just enter promo-code “TACR10” at https://mgmtargets.com 

In this video I want to share with you my favorite Steel Target for teaching Combat Shooting; the MGM Spinner Target. MGM is a strong supporter of our armed forces and our constitution. We have a Link that will take you straight to their Homepage, where you can find my favorite target along with all their other great products.  Big THANKS out to Mike Gibson and his whole great family.

It I could only own one piece of Steel targetry, it would be this Spinner. As a matter of fact, I have deployed to combat zones with one of these Spinners. Just as my assaulters; this puppy will help keep your skills sharp.

If you just need a stationary target, you can drive a wooden stake into the ground in front of the bottom plate, and that’ll keep it from rotating.

It looks like a “carnival ride” that you would find at a 3-Gun Match. “So, why does Karl like it so much for teaching Combat Shooting?”  Well, go watch the video, and I’ll explain it to you.

Thanks for watching. Strength & Honor, TR.

Tactical Rifleman
How Special Ops Load and Make Ready | Unload | Tactical Rifleman

This Video covers the proper way to load & unload your primary and secondary weapons.
   If you surf the internet, you’ll find literally millions (with an M) of shooting videos. Several are pretty good, very informative, and professionally done. However, these videos don’t get many views or hits. Now, flip to the other extreme, and there are tons of videos showing very entertaining jackassery with firearms that, while filmed professionally, are down right unsafe. These get millions of views within seconds of them being posted.
   When we at Tactical Rifleman were first contemplating making instructional youtube videos, we didn’t give a shit about being entertaining to the masses. What we wanted to do was build a place where operators, professionals, and gun-loving  citizens could go to find good information on guns, gear, and training.
    This video is the textbook example of what we wanted to do. While it is a simple and boring video; it sets a standard that is repeatable while also explaining why we do it the way we do. Every operator or student that attends one of our pistol/carbine courses has to learn the proper standard for loading and unloading their weapons. Now, while it does vary slightly by unit; most will agree with the need for this standard. There is a method to the madness.
   Why do we load the Pistol first? Well, because it can then be placed securely in a holster that protects the trigger mechanism of the weapon. If we had loaded the rifle first, it would have been left hanging loaded, bouncing around on the front of our kit, while we we loading our pistol. We teach to always have positive control of a loaded firearm. Make sense?
     Why to we check the sights? To make sure they work. This may be the last time you look at them before getting on the helicopter. Better to find out now, before getting on the bird, while you still have time to get fresh batteries or replace a broken fiber-optic sight before a match. Make sense?
     Why load from your “Speed Reload” pouch? It’s just one more repetition… one more rehearsal of a speed reload; kept fresh in your subconscious mind. That’s the one reload that HAS to be SMOOTH & FAST; why wouldn’t you want to practice it every time you load? Make sense?
   So, they learn these skills and techniques when they attend our courses, along with a thousand other little tidbits of information. Now, what happens two years later, when the Gunny tells the Lance Corporal to “go teach the new privates how to properly load & unload their weapons”? That Lance Corporal can now go to the web, watch this video to refresh the standards in his memory, and he can go out and teach a great class. Also, if the Lance Corporal screws it up, the Gunny can then send all the privates to go watch this video (while he sweet talks the Lance Corporal).
    Our intent is to give you a place to go to find good information on guns, gear, and training. The other sites are fun to surf when you need a good laugh. However, when you need good tips and techniques, you can always turn to Tactical Rifleman. So, subscribe to this site. Share it with your friends. Add comments and questions. Thanks for watching. Strength & Honor, TR.
 

Tactical Rifleman
How to Replace a AR Trigger | Timney Triggers | Tactical Rifleman

Some people ask why you might want to change the trigger in your AR.  I explain that with trigger control being one of the important fundamentals of shooting and that a standard AR has an two stage trigger with 5-8 lb pull, you might want to change that stock trigger to help you improve your trigger control.  

In this video I show you how to replace the stock trigger with a Timney 667s.  This is a single stage trigger that is set to break at 3 lbs.  I like Timney because this is a one piece unit that is simple to install along with having a crisp clean break every time at 3lbs.  Timney has been building great rifle triggers for over 60 years. 

When exploring the different triggers, it’s important to find a product that is right for you and your needs.   Here are the main differences between the two-stage and the single-stage replacement triggers.

What are Single-Stage Triggers?

Single-stage triggers are the traditional product for the avid user. They’re designed to operate in one smooth range of motion allowing you to pull the trigger through to release the pin. It’s simple and there are no gimmicks involved in the use of single-stage triggers. Many find single-stage triggers easier to adjust and with a clean break in the trigger action.

What are Two-Stage Triggers?

Two-stage triggers have an operating process that involves two distinct phases of firing. The advantage of this style of design is that it allows the user to know exactly when the firing will take place. They know that once they set the trigger after the first phase, the gun will fire. Instead of breaking and firing as part of one process, you hit a break wall within the firing of the weapon. Immediately following this break wall, the weapon discharges. Knowing when the trigger is going to break gives you the advantage in terms of accuracy over your target. You’ll be able to time your shots more effectively, and mitigate issues with balance and unsteady grips that can limit some weapons.

How to Choose Between the Two

In choosing between single-stage replacement triggers and two-stage triggers, it’s important to determine what you want from the weapon. The single-stage triggers work well for those who require a fast action pull with reliable performance, while the two-stage triggers are effective for target practice in high stress scenarios.

Thanks for watching the video and if you have any direct questions for Pete you can contact him at pete@alansarsenal.com
 

Tactical Rifleman
Special Forces Medic Reviews Tourniquets | Tactical Rifleman

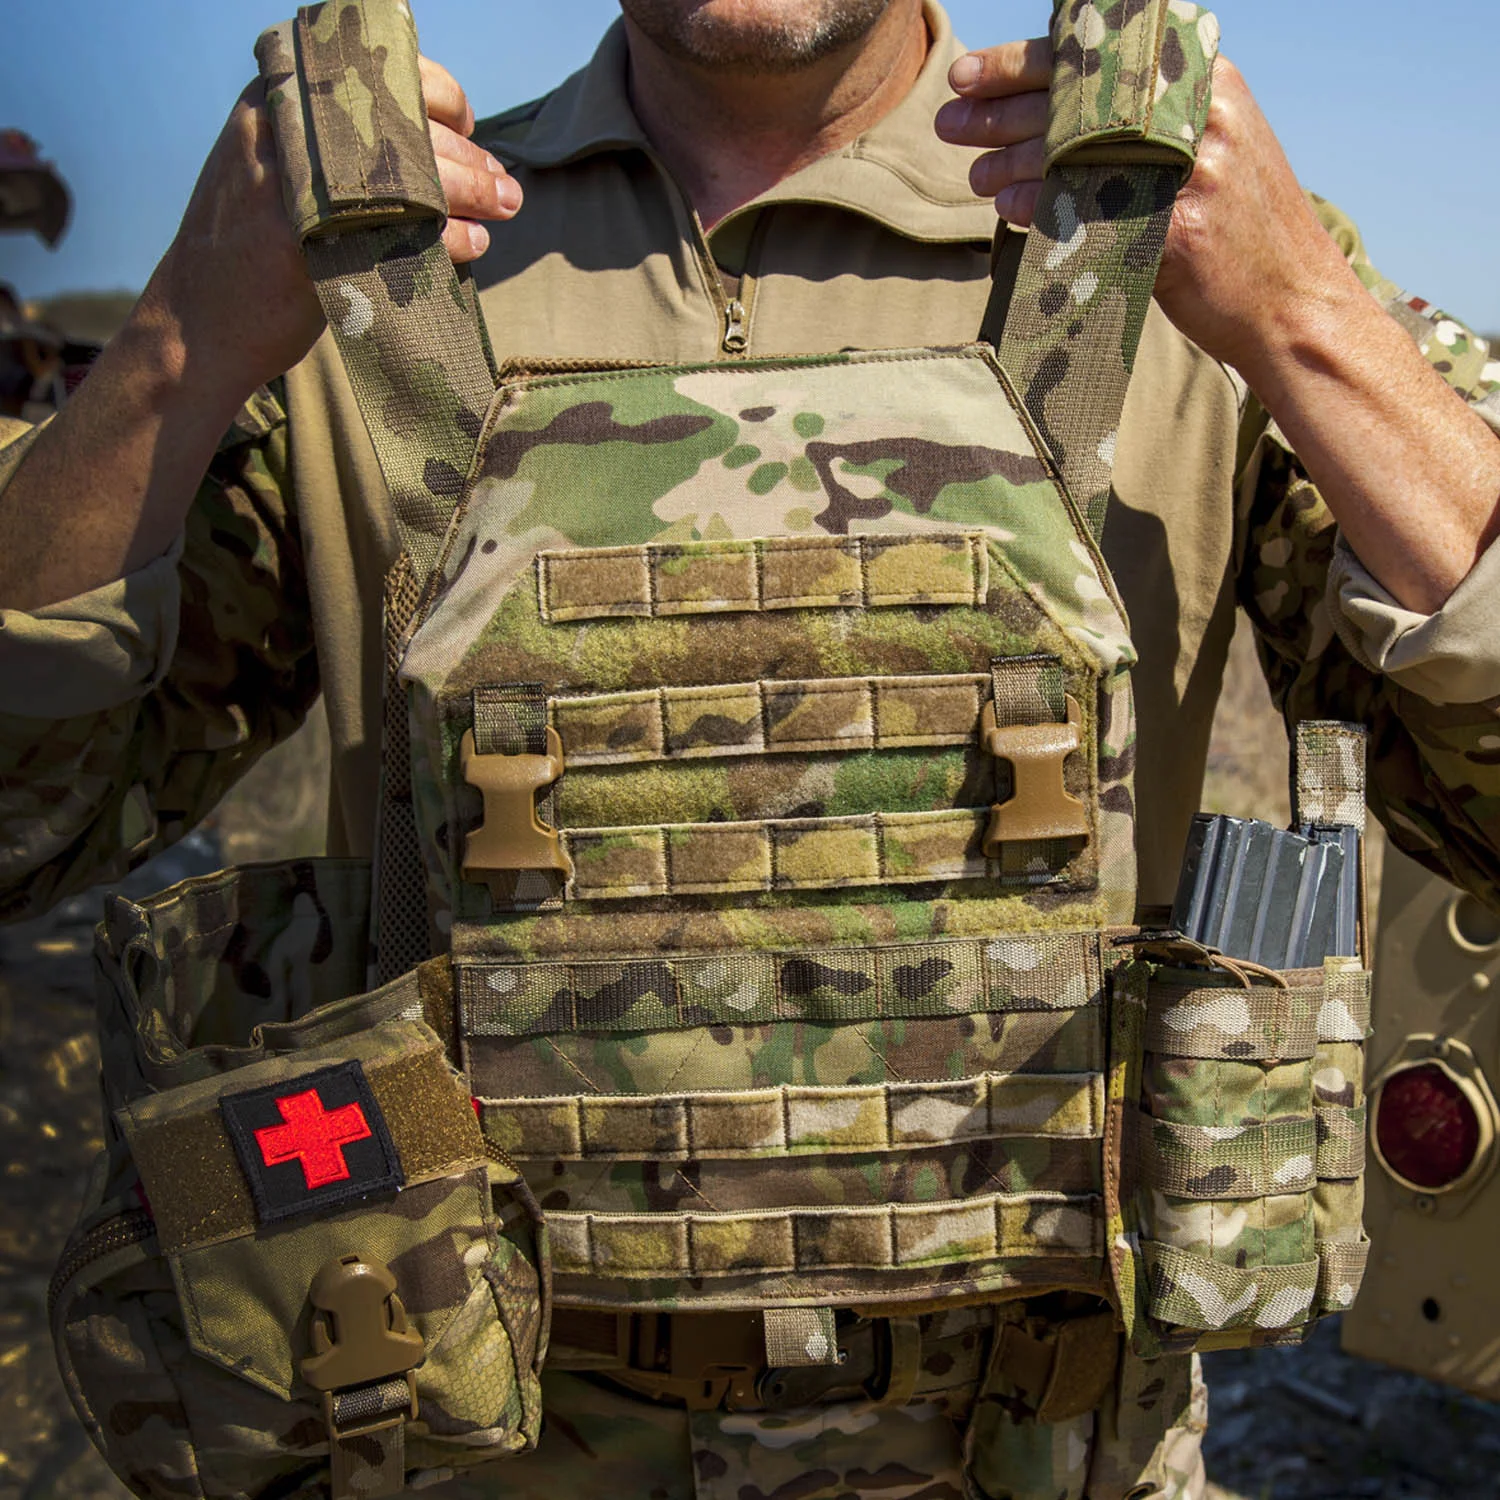
This week, on Tactical Rifleman, we are going to cover Tourniquets. We get a lot of questions about the Med Kits we carry.

If you are looking for the tourniquets used in this video

CAT Combat Application Tourniquet - GEN 7
http://amzn.to/2CEhRrR

SOFTT-W Tourniquet
http://amzn.to/2CWRU4g

TK4 Tourniquet
http://amzn.to/2CJsYzG

 When you talk Medical Gear, first and foremost, we want to push Tourniquets.  The best way to prevent Hypovolemic Shock, is to keep those Red Blood Cells inside the body.

     I want that last sentence to sink in… The best way to prevent Hypovolemic Shock, is to keep those Red Blood Cells inside the body. Imagine, middle of the gun fight, you see your buddy lying there bleeding bad. You are 50 feet from good cover. How long would it take you to drag him 50 feet over rough terrain? How long would it take you to scoop him up and “Fireman’s Carry” him 50 feet? Now, as fast as you think you are, it’ll probably take twice that long real world. Next question: How long would it take for him to bleed out 2 liters of blood from a major injury? I say 2 liters, because that’s all it takes to push someone into Uncompensated Shock.  So, what do we do about it? We put Tourniquets on ASAP, before we drag him to safety.

   As a Special Forces Medic (18D), I was taught to clamp bleeders and all kinds of other great ways to stop bleeders. We were taught that Tourniquets were a last resort. We were taught WRONG. This little 15 year war (thanks politicians) has cost us thousands of lives, and has been a great case study on the treatment of trauma on the modern battlefield. We now teach TOURNIQUETS IMMEDIATELY.

     Once you put it on, leave it on. Don’t worry about damaging the limb or crushing injuries. The doctors have protocols for dealing with tourniquets and their removal. Let the Docs in the hospitals remove the tourniquets.

     I know you internet ninjas want a shooting video every week. Here at Tactical Rifleman, we cover everything involved with “Shoot / Move / Communicate.” Medical is a big part of that, and Tourniquets is a big part of Tactical Combat Casualty Care (TCCC). I encourage everyone to attend a good TCCC course, like the ones taught at Tier-1 Group (t1g.com).


     Thanks for watching. Strength & Honor, TR

Tactical Rifleman
M240 Medium Machine Gun | How to Load Unload and shoot | Tactical Rifleman

This week, on Tactical Rifleman, we are going to do a brief introduction into the M-240 Medium Machinegun. Pretty well everyone in the modern US military is familiar with this weapon. It’s used in helicopters, as COAX on tanks, and is the bread-n-butter of all our weapon squads. We aren’t going to bore you with all the statistics. If you want to know the text book maximum effective range, then go to an E-5 Promotion Board. Rather, we are just going to cover Load/Unload/Malfunctions, and then wrap it up with dumping 400rds into a couple illegally parked cars. Hope you enjoy. Strength & Honor, TR.

Tactical Rifleman
How a Navy SEAL Clears a Room | Close Quarters Combat CQC | Tactical Rifleman

DISCLAIMER: This is NOT a TACTICS Video. Jason is ONLY showing tips on Foot-work; for Operators that already have mastered the basics of CQB. ****
     This week on Tactical Rifleman we get into a little Close Quarters Combat (CQC) tips and techniques.  CQC is practiced over the course of all Special Forces careers and endless hours are spent honing these skills as it is sometimes considered the “bread and butter” of the trade.  Operators work tirelessly to perfect this craft and breakdown each phase of an assault as to increase their performance from one kinetic operation to the next.  In this video, former Navy SEAL and owner of Arion Risk LLC shows us a simple hack to optimize efficiency of movement into a space.  Although it may seem like common sense, even the entry through a doorway is thought about and practiced.  The way in which an operator initially enters a space is just as important as their action within.  An operator has to be on balance through all phases of an entry in order to take a well-placed shot regardless of target position.  A simple calculation of foot placement and entry procedures can be the difference between a well-aimed and balanced shot and a miss.  The technique shown in this video is a testament to the detail with which Green Berets and SEALs practice their trade.  So, listen up! This video will forever change the way that you enter a room and may you never be off balance again.

Get the shirt Jason is wearing in the video and help support Tactical Rifleman by purchasing one of our T-shirts, check them out at: https://shop.spreadshirt.com/Tacticalrifleman/men

For more go to http://www.tacticalrifleman.com/   
Follow us on Facebook: https://www.facebook.com/TacticalRifleman/  
Instagram: https://www.instagram.com/tactical_rifleman/?hl=en  
 Twitter-http://bit.ly/TACrman

Tactical Rifleman Comment
Top 5 Combat Drills | Special Forces Training | Tactical Rifleman

This week, on Tactical Rifleman, we are going to cover Karl’s favorite 5 Rifle Drills for New Shooters. Yes, there are hundreds of great drills out there. Yes, you need to practice all your critical skills, such as transitions, malfunctions, and speed reloads. However, first and foremost, new shooters need to develop muscle memory. That takes thousands (7-9k) of repetitions of the same CORRECT movements and actions.

    You’ll see that each of these drills builds on the drill(s) before it; so that you are continuing to push those said movements and actions into your subconscious mind. It’s like driving… the first few months, you had to think about brakes and turn signals. Now, you just drive subconsciously. That frees up the conscious mind to focus on signs, signals, and other drivers. Likewise, you need to push all these basic shooting skills into your subconscious mind. That frees up the conscious mind to focus on “Is it a Threat” and “Is it a Threat that warrants Deadly Force?”

   Master these drills, through lots of repetition of each. If your unit doesn’t have that much ammo, then start with dry firing, and wrap up with live fire. Once, you have mastered them, then add all your critical skills to these drills:

Add Transition to Pistol Drills, every time your rifle runs dry or malfunctions
Add Tactical & Speed Reloads
Add Turning & Moving Drills, to these drills
Use Dummy Rounds, to induce Malfunctions during these drills.
Once you have mastered these five drills; we’ll give you plenty of other great shooting drills to work on. When you are ready to test; use the timed Critical Task Evaluations (CTEs) to see if you make the standard. If you don’t know them, we are going to cover them in an upcoming video, on Tactical Rifleman.

    Again, we know there are tons of other great rifle drills out there. I know all the Internet Ninjas are gonna start screaming how “Their Drill is Better” or how we “Obviously don’t know how to Shoot.” Yep, you guys are awesome. However, these are still Karl’s Top-5 Combat Drills for New Shooters. Thanks for watching. Strength & Honor, TR.

Tactical Rifleman
How To Build a Sniper Firing Position | Special Forces Sniper explains | Tactical Rifleman

Tactical Rifleman has gotten a number of requests, on how to setup a Sniper Firing Position. Yes, we read your comments. Got a good idea for a video? Ask and you shall receive.  So, this week we are going to talk about building a solid (and accurate) sniper firing position.
    If you take nothing else away from this video; please remember that Consistency is the Key to Accuracy. You have to have ammo that flies the same speed every time. You have to have a bullet that has a consistent weight and shape every time. Likewise, you have to build a launch platform, that launches that bullet the same every time.
     The Sniper has to be as comfortable as possible and have a good “natural point of aim.” Relax on the gun, with your eyes closed. When you open your eyes, you should not see any shadow around the scope. If you do, your head is not centered behind the scope, and you need to adjust your stock and eye relief. If you open your eyes and your cross hairs are not centered on the target, then your natural point of aim is off, and you need to move the gun. Small corrections can be done by just moving the gun. However, major corrections, you may need to move/adjust your whole position.
    We are also going to talk about laying in the Spotter. Remember, a Sniper position is a two man team. The Sniper has to be comfortable. Lay the Spotter in so that his Spotter Scope is as close to “gun line” as possible, without bumping the sniper. Also, make sure that the legs of your spotting scope aren’t near the elbow of the sniper. Otherwise, when the gun goes off, his elbow may bump your spotting scope and you won't see shit. The key to a good Spotter Location is that he has to be able to read “Trace.”
    So, lay your Shooter in. Make him get a good position. Then lay in your Spotter around him. Focus on doing it the same way every time. Remember, Consistency is the Key to Accuracy.  Thanks for Watching. Strength & Honor, TR.

Tactical Rifleman
.45cal Vs 9mm Ballistic Test | Ammo Comparison | Tactical Rifleman

In this video we are comparing Barnes TAC-XPD 9mm against Corbon Pow’RBall .45acp.  I’m shooting them into VYSE professional grade ballistic gelatin blocks from Custom Collagen from 10 meters away.  We opted to use these two types of ammo in an effort for a blind comparison between different size calibers and without using a pistol vs. rifle caliber.  Members of Tactical Rifleman paid for the ammo and firearms in this video and were not paid by any manufactures of any of the products used.  
Both of these bullets are hollow point in order to show a closer comparison of bullets in different calibers.  The 9mm TAC-XPD is 115 grain and has 1125fps velocity while the .45 acp Pow’RBall 50 grains heavier at 165 grains and has 1225 fps velocity.  The 9mm is shot with a Sig Sauer P320 RX and the .45acp is shot with Caspian 1911.
I will say that I was surprised with the results  between the two and I thought there would be a closer outcome with shooting them into the gelatin.  Between the two, one is 50 grains heavier, flies 100fps faster and is about .10 in caliber size larger of a bullet.  Once the 9mm enters, it opens up to about .75” penetrates through the first block into the second.  This was very consistent with all three rounds fired.  The .45acp due to the polymer ball helps open up the hollow point to over 1” in size and stops just before going through the first block. The polymer is also designed to improve aerodynamics to the bullet while in flight .vs a standard hollow point round and enhances feeding in semi auto pistols.
Tactical Rifleman, nor I, is telling or suggesting what ammo to use for self defense just merely showing a comparison of two different types.  Please do your own research and understand that shot placement will always out perform type, size and number of rounds used.
Thanks for watching the video and if you have any direct questions for Pete you can contact him at pete@alansarsenal.com

Tactical Rifleman
How Special Forces setup their Hummer | Mount Weapons | Tactical Rifleman

Tactical Rifleman tries to bring our viewers a wide variety of information about subjects dear to our hearts… which is mostly things that go bang or boom. We have recently done a couple of weeks of new weapons, like the Army’s new pistol. So, this week, we wanted to change it up a bit. So, we are going to jump backwards in time and talk about our old reliable DMV (Desert Mobility Vehicle) and all the modifications that have been made along the way. First, we needed a HUMMER with most of the current modifications on it...
     We went down to Military Systems Group, in Nashville, to check out some of their new toys and some of their old toys. MSG has been providing vehicle modifications and accessories to our military forces for as long as I can remember. I ran vehicles with their gear in Afghanistan. I ran vehicles with their gear in Iraq, and some of their latest gear can be found in just about every little hot spot on the planet.
    In this week’s video Jay Johnson takes us through MSG’s Hummer, and talks in detail about all the mods currently available.   Jay and I go way back; he was on my first A-Team close to a hundred years ago. When I moved on to the CIF Company; Jay moved on to specialize in Desert Mobility. If you want to talk tactical vehicle operations in the desert, you talk to Jay Johnson.
    Jay and I get nostalgic a  couple times during the filming of this video, and we wanted to go down the rabbit hole telling war stories; but we held back. Good thing, because this video is almost 48 hours long!!! Well, not that long, but it is still the longest Tactical Rifleman video to date.
    We cover everything from bumpers to Swing-Arms to Barrett .50cal mounts. So, if you like military gear, or you want ideas for that Jeep Rockcrawler, please enjoy the video.   Thanks for Watching. Strength & Honor, TR.
 

Tactical Rifleman
How a Navy SEAL sets up his Body Armor | Navy SEAL Techniques | Tactical Rifleman

Here at Tactical Rifleman we want to give experts and amateurs alike different points of views regarding shooting, moving, weapons, and tactics from different members of our elite military units.  This week we have Jason Phalin, former Navy SEAL and founder of Arion Risk LLC, here to show you a personal version of the various body armor setups Navy SEALs utilize to perform one of a variety of mission sets.  In this video, Jason walks us through his body armor setup utilized in fast assault, direct action missions and low-visibility operations where a bulky setup would hinder performance and reaction times.  Navy SEALs conduct highly specialized missions all over the world and have various body armor setups to facilitate the mission.  Setup is normally based on the requirements of 80% of the mission and is very operator specific.  Land Warfare enduring operations require more space and surface area to enable operators to carry more equipment.  Maritime operations setups, for instance, have to accommodate flotation in case of unwanted water entries as well as required safety items if inserting by helicopter over water.
 
I know everyone has their own opinions on placement and access of certain tactical items, but I am here to tell you, every operator is given the flexibility to organize their own kit.  Certain items are an “equipment common to all” which every man must carry as standard load out, but all operators will place the gear necessary to complete their job in the platoon in whatever order they wish.  By the time the platoon is ready to deploy, all members of the platoon pretty much know each others kit back and forth.
 
Every SEAL will have different setups but generally, the setup shown in the video is pretty close to what you would see in a typical SEAL mission.  At the end of the day as long as you get the target secure while carrying your part of the loadout and look cool while doing it, that’s MISSION SUCCESS. 
 
As always, please submit questions and comments below
 
Happy Hunting Tactical Rifleman nation!!

Tactical Rifleman
How to zero with EOTech | Shooting Techniques | Tactical Rifleman

Here at Tactical Rifleman, we wanted a YouTube Channel where operators and civilians could go to get information on how to “Shoot, Move, and Communicate.” So, this week, we are going back to our core basics and we are going to talk about how to zero an EOTech red dot sight. EOTechs started showing up at Group in the late 90s, and are battle proven.  I personally prefer a EOTech over an Aimpoint; simply because the EOTech has a smaller center dot (for fine longer distance shooting) and also has a large Circle that is easily acquired at CQB distances. Yes, there was some bad press about zero shift with massive temperature changes, but I have never had issues of zero shift. I have had several go “Dim” on me, but never lose a zero.
     Now, back to the video… I thought everyone knew how to zero red dots, but we have had multiple viewers ask for help; so here we are… ask and you shall receive.
   Whenever you are zeroing your sight, irons or optics, always try to ensure you have a stable firing position. That includes proper body position, sight alignment, and a good natural point of aim.  Once you have properly mounted your EOTech (I’ve seen them mounted backwards), it should be fairly close right out of the box (on paper at 25 meters). You can also co-witness your EOTech to your Iron Sights, if you already have them zeroed. By this I mean, line up your iron sights on the bullseye and hold them on target, while your partner dials your red dot to your sight picture using the windage and elevation adjustments on the side of your EOTech. This works most of the time. Sometimes, if you are running a tall mount to clear illuminators/lasers, your EOTech’s objective lens may be slightly too high for this technique but, again, it works most of the time.
    Whether you zero at 25, 50, or 100 meters; I don’t care. There are pros and cons of each, and we actually cover them in a different video (25 vs 50 meter Zeros https://youtu.be/7s5v0aeENOY ). For this video we used 50 meters.
         Use a good zero target. You can download them for free all over the internet or design your own. Just make sure they print to scale. I like a big dark circle with a dot in the middle for zeroing red dot sights. Dim the dot till you can just barely see it. This will give you a small point of aim.
    We like to zero with 3-5 round groups. I actually prefer 5 round groups, as I’ll cover in a later video, but that would have added 5 more seconds to an already long YouTube video. Seriously… that’s what I get told by the film crew.
 
Adjustments (clicks) will depend on the distance that you are shooting at.
1 click = ⅛ inch at 25 yards
1 click = ¼ inch at 50 yards
1 click = ½ inch at 100 yards
Make your adjustments and repeat. Again, fire another group, mark target, and adjust the EOTech scope as needed.  Too Easy.   
    Once you are dead center, pop a few more shots just to make sure, and then you’re done, right?  Close. Once you are zeroed, always try to go back out to distance and verify that your zero is correct. A 50 meter zero should put your 5.56mm AR rifle right on at 200 meters. So, if you have a long distance range, go out and double check your zero at 200 meters. You may find that you are slightly left/right or high/low. You can now make fine adjustments to your actual zero, 1 click = roughly 1 inch at 200 meters.  Once done, now you know your rifle is dead on and you own the battlefield out to 220 meters.
    

Thanks for watching. We have done videos for zeroing iron sights and other optics in the past, and will do more in the near future. Strength & Honor, TR.

Tactical Rifleman
The Army's New Handgun | SIG SAUER P320 | Tactical Rifleman

The gun that you are seeing in this video is the Sig Sauer P320 RX. This is a full size P320 Pistol that is close to what the US Army will be replacing the Beretta M9 pistol with.  The Army will call their version of the P320 the M17, it will be the full size model like the one in video.  It also will come in a FDE color and have an ambidextrous manual safety and unlike the RX variation that I have in the video this will not come with the Romeo One red dot sight.  

The new M17 beat out many other pistols including the model that Glock before is was picked earlier this year.  I feeling for the biggest reason that this one beat out all the others is because of the modularity of this pistol.  Like most others that were put up you can change the size of the grip, some all you could do was make the grip larger with add on panels not any smaller.   With the Sig you can completely change the complete lower half of the pistol from a smaller to a larger size grip.  I could also see the in the future the Military might also purchase different complete upper slides (with barrel) so that the M17 can then be changed to a compact or sub-compact model without have to purchase a different pistol all together.

Because to the trigger pack being the serialized part of the weapon another thing that you can is change the caliber of the firearm by changing the complete upper slide and the magazine for the caliber of chose.   I do not see the Military doing this to the M17.

Currently Sig Sauer does have a voluntary safety recall and they are also updating the newer models before they ship out.  The changes that are being made are a new trigger shoe that will have a thinner profile and reduced mass.  Also the slide is updated that will feature a disconnect notch near the striker assembly.  Both of these update changes are expected to refine functionality for the pistol and improve both its safety and performance.

Tactical Rifleman
How to Zero With Iron Sights | Shooting Techniques | Tactical Rifleman

Here at Tactical Rifleman, we wanted a YouTube Channel where operators and civilians could go to get information on how to “Shoot, Move, and Communicate.” So, this week, we are going back to our core basics and we are going to talk about how to zero Iron Sights on a typical rifle; AK, AR, FAL, it really doesn’t matter, as the principles remain the same.  I thought everyone knew how to zero Iron Sights, but we have had multiple viewers ask for help; so here we are… ask and you shall receive.
   Whenever you are zeroing your sight, irons or optics, always try to ensure you have a stable firing position. That includes proper body position, sight alignment, and a good natural point of aim.  Once you have properly mounted your Iron Sights, whether they are built on or “Back Up,”, they should be fairly close right out of the box (on paper at 25 meters).
    Whether you zero at 25, 50, or 100 meters; I don’t care. There are pros and cons of each, and we actually cover them in a different video (25 vs 50 meter Zeros). For this video we used 50 meters.
         Use a good zero target. You can download them for free all over the internet or design your own. Just make sure they print to scale. I like to use bright orange pasties, but for this video we used the standard military zero target. No matter what target you use, ensure it has a small highly-visible center. This will give you a small point of aim.
    We like to zero with 3-5 round groups. I actually prefer 5 round groups, as I’ll cover in a later video, but that would have added 5 more seconds to an already long YouTube video. Seriously… that’s what I get told by the film crew.
    What kills people, when shooting Iron Sights, is that they don’t focus on sight alignment. Those sight have got to be perfectly lined up. For easy math, let’s say your rifle sights are 2 feet apart. If your sights are not lined up, say a quarter of an inch out of alignment; that doubles every 2 feet. Quarter becomes a half, a half becomes an inch and then then thing you know, you are missing by 6 inches at 100 meters.
   Adjustments (clicks) will depend on the distance that you are shooting at, and the type sights you are using. If you are not sure; look it up in the manual that came with the sights, or Google it on the web. Still can’t find it?... Make bold corrections of 10 clicks,  and then measure how far 10 clicks moved you… divide by 10, and you now have the value of each click.
    Make your adjustments and repeat. Again, fire another group, mark target, and adjust the Iron Sights as needed.  Too Easy.   
 

Tactical Rifleman
Shooting Agility Drill | Dice Drill | Tactical Rifleman

This week Rob takes us through another Agility Drill. This one is called the “Dice Drill.” As Rob says, it’s not meant to be tactical, but rather more of just an exercise drill (Shooting & Moving), that builds off of his “One Leg Drill.”  All you need is 5 small cones, and then draw a 2 meter circle around the center cone.

    The key here, is for the coach to call the new number right as the shooter enters the circle around the center cone. The shooter must then adjust his movements to the new situation and move rapidly to the new cone to fire those next two bullets.

   As with the other agility drills; start slick, then add kit. Start slow, then add more speed. Start close, and then move farther out. Just, the one thing we don’t want you to change, is the placement of accurate shots. Don’t sacrifice accuracy for speed.

    We like to run these drills with Steel targets, using Frangible Ammo, as it lets the instructors cycle through multiple students faster. However, if you don’t have steel targets, or Frang, you can substitute scorable paper targets.

    Again, all you need is 5 cones. That said, if you have the range space and 4 barricades; you can also do this drill using wooden barricades. The goal is to make you faster, at moving to cover, and delivering well-aimed shots quickly.

    So, get off the couch, jam a few mags, and go give this drill a try. Thanks for watching. Strength & Honor, TR.

Tactical Rifleman