Many people are super competitive when it comes to duplicating drills etc (me as well). I want to be the best I can be but not at the cost of “stacking the deck” so to speak. By that, I’m talking about the process of getting your race gun, your OWB holster, and warming up a ton prior to testing your abilities on a drill. That’s fine! I do the same thing sometimes. Let us not forget to prepare for the self defense situation though.
Always give yourself a few dry runs with your set up for the day, and always run some plain clothes and concealed carry set up drills on the range when you can.
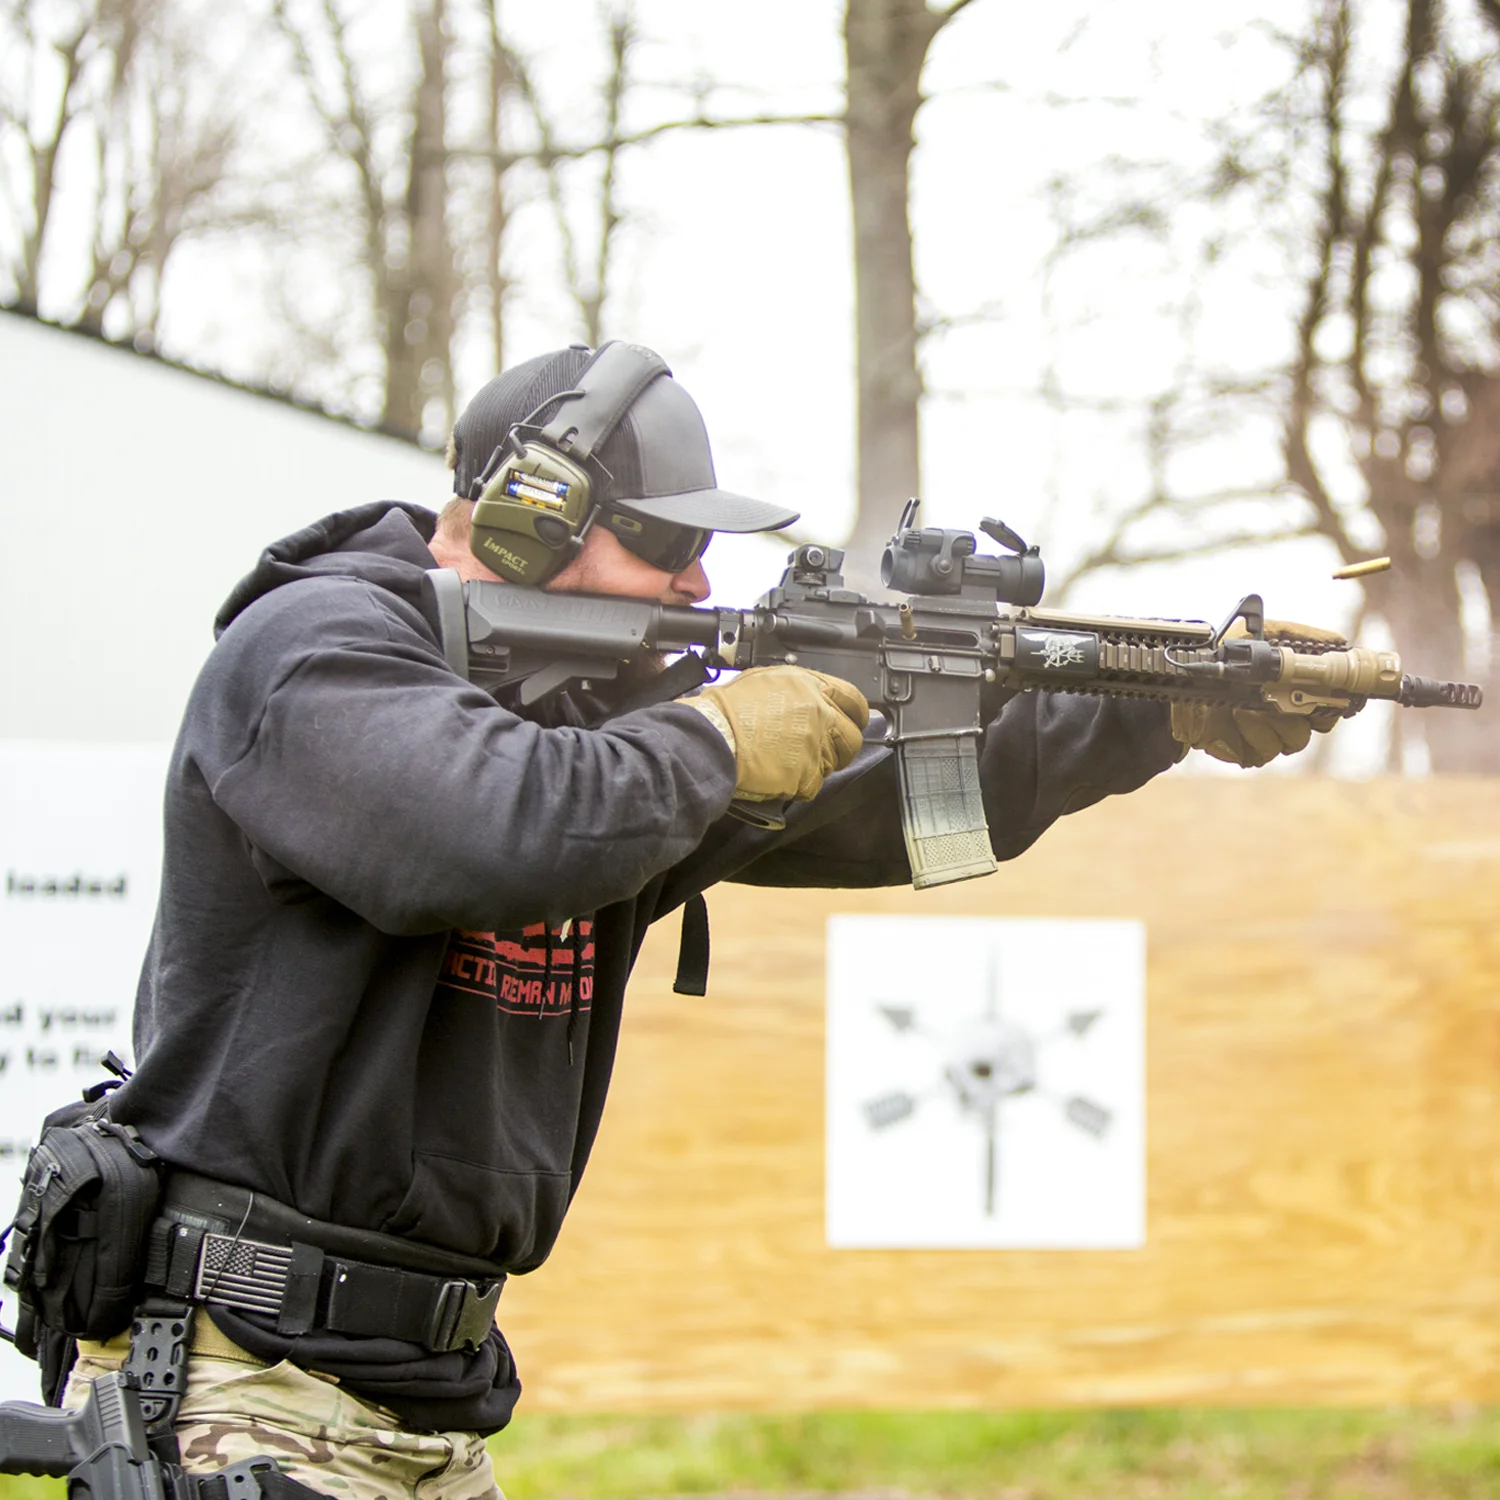
The cornerstone of being a Green Beret or any other Special Operations Soldier is training and knowing the basics! As you can see, there is not much flare or pizazz to these few drills shown. Don’t be fooled though, there are many important components that are being worked that apply to many more complex drills. I suggest doing these basic drills until you have acceptable accuracy and speed (safety always first). Once you are easily executing these drills, instead of graduating to other drills, add some stressors to the mix. A few things you can add that will give you some stress and better simulate a real life threatening scenario are: time standards (shot timer), physical activity, target variations (smaller, target ID, hostage etc), or even an audience of peers watching you.
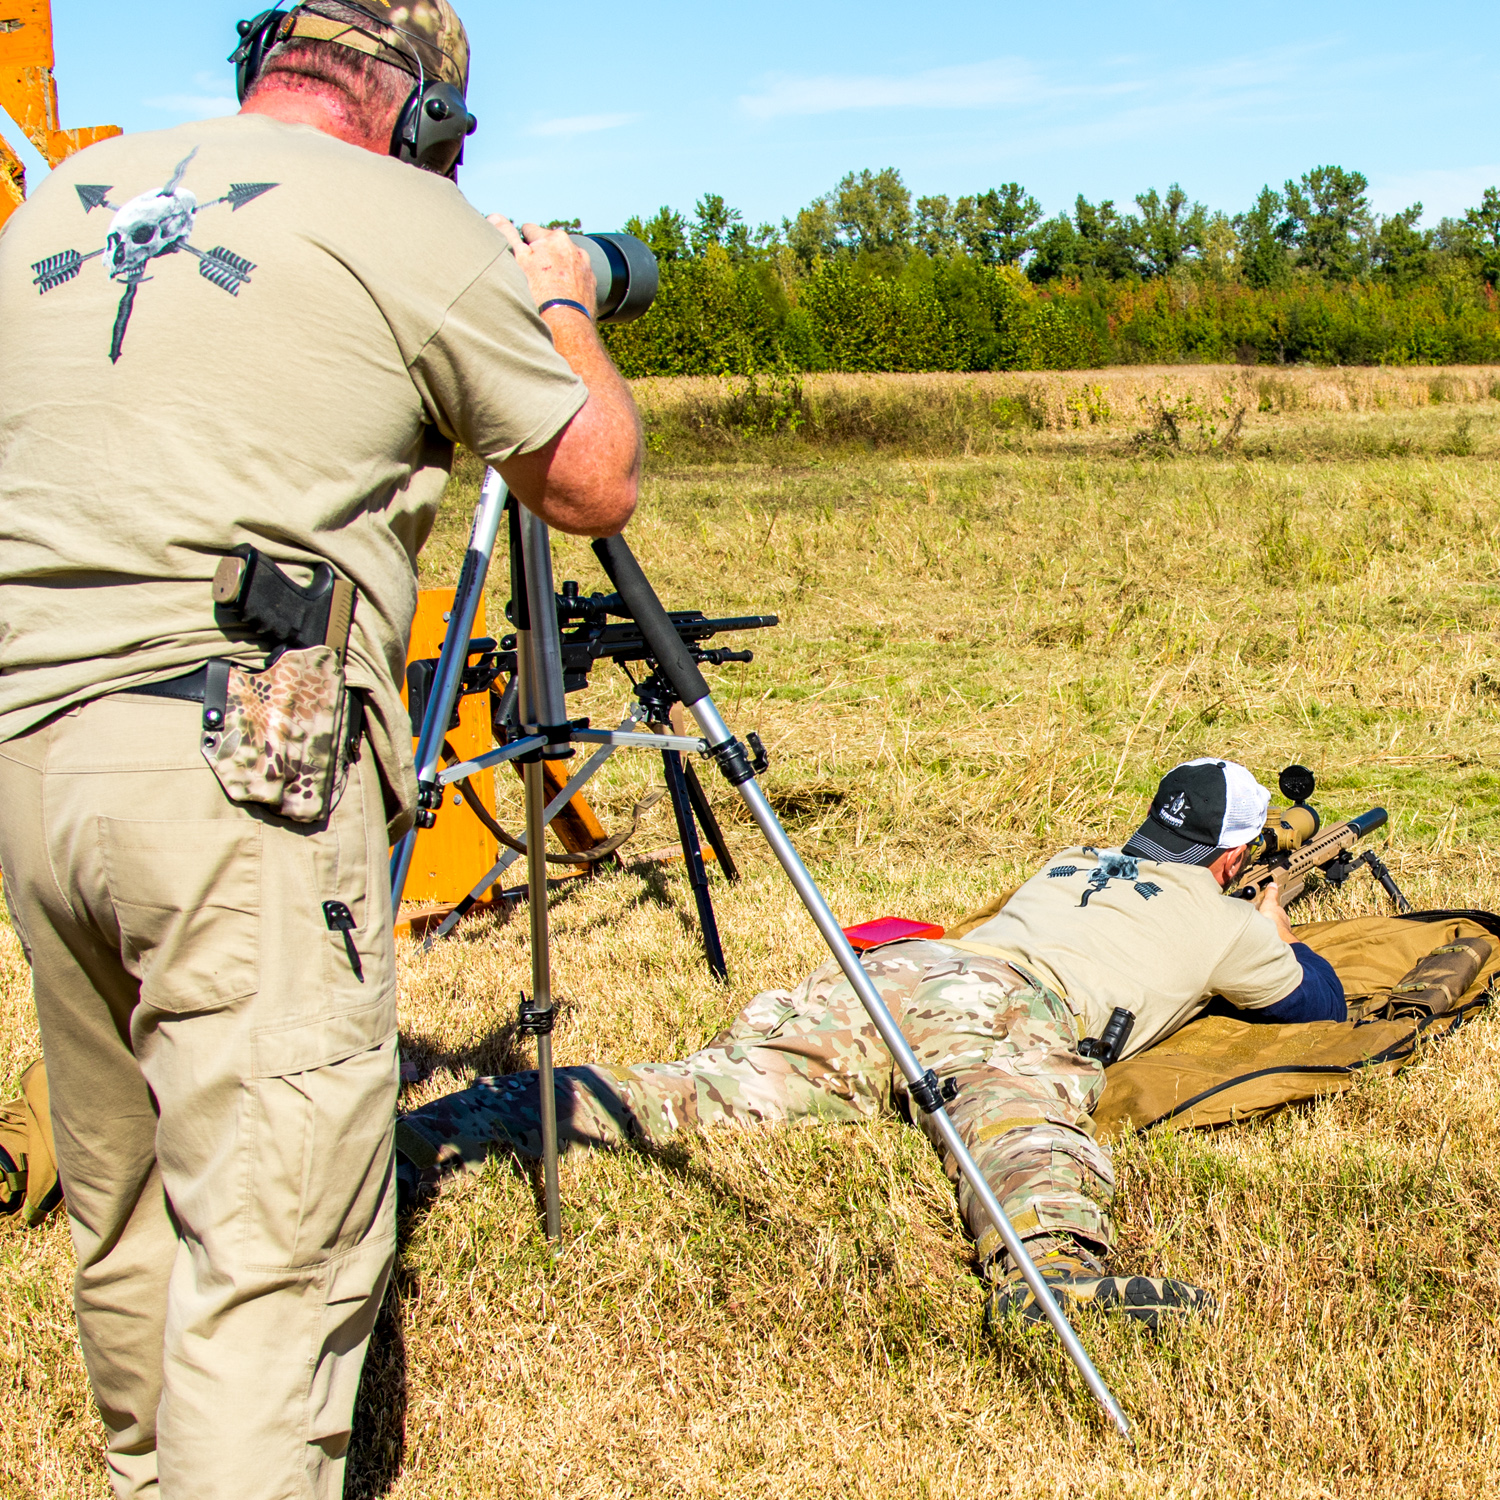
After that, get some force on force training with training munitions that really puts your skills to the test in a 2 way gun fight. Remember, the flat range with no bad guys is the easiest place to execute shooting drills, you can only go so far there.
Sergeant First Class (Retired) Donnie Bowen has about 22 years military experience; 13 years of experience within Army Special Forces as a Green Beret, conducting all aspects of Special Operations, to include training, execution, and technical oversight at the detachment and company level, and as well as the training and execution at the combined joint task force level. SFC Bowen has earned numerous awards, to include a Army Commendation Medal for Valor. His military schooling includes the Special Forces Weapon Sergeant Course, Military Free Fall Course, SFARTAETC, Mountain Warfare Course (Summer and Winter), USSOCOM Joint Armorer's Course, S.E.R.E. -C (High Risk), Modern Army Combatives Program (MA.C.P.) Master Trainer Course, Special Operations Combatives Program (S.O.C.P.) Instructor Course, to name but a few. SFC Bowen is a Brazilian Jiu-Jitsu Black Belt, a Judo Black Belt, and a Black Belt in two Karate disciplines, as well as has a couple years of experience in the Filipino and in the Indonesian martial arts training in the art of the blade and the use of blunt objects for offense and defense. SFC Bowen is also a graduate of the Operational Security Strategies "Lone Operator" Unconventional Warfare Strategies Course. After retiring, SFC Bowen is the founder, owner, and head instructor of BOWEN Combative Arts Academy in Clarksville, TN, where he teaches and coaches children to adults in the arts of Brazilian Jiu-Jitsu, Judo, Muay Thai Kickboxing, Wrestling, Self-Defense/Bully Proof Techniques, etc.. He even work with local law enforcement, SWAT, and first responders on basic combatives techniques.
The “check” drill is one of my favorite drills to do on the range but it is only for those that have become safe and proficient in all of the sub-tasks involved with the drill. If you are not to that point yet, I suggest that you break down each task and deliberately train these things until you are comfortable with it (up drills, reloads, draw from holster, transition, re-holster, etc.).
If you try and tackle the more complex task all at once you could develop some bad habits inadvertently. So, go at a speed that allows you to consciously acknowledge the small movements and do them right (eg. trigger finger indexed, safely holster, placement of hand on rifle when going back to rifle, efficient movement based off of your sling/equipment set up etc.). Remember that Green Berets May have advanced training but the basis of everything we do is being solid on the fundamentals! That’s it from Instructor Zee and Tactical Rifleman. Thanks for tuning in!
Hey Tactical Rifleman nation! This week on TR, I give you guys a quick tour around one of my AR setups. Now, spoiler alert... nothing on my setup is going to really blow any skirts up. I have the usual SOP setup (optic, back-up irons, flashlight, etc.) But what I have found is some great products on the market these days that can really boost your AR performance. Things such as trigger upgrades, grips, flashlights, etc. can really step up your rifle game. For my active duty heroes, I know there is only so much you can do with your service rifle but maybe this video will help you pick out a sport rifle to train with and evolve your skills to the next level.
One thing I would like to point out on my setup is my new Ryker Grip. I was a little skeptical about this piece of kit but once I put some rounds downrange using this new grip, my mind was changed. The Ryker grip is one of the easiest and best upgrades I have made. I suggest you check out their product line and see for yourself. I found the target acquisition to be just a step quicker and easier on the shoulder for long days training on the range. As always, I hope this video helps you out and look forward to the comments and critique. Stay violent, my friends!!
This week, on Tactical Rifleman, we are going to do another Precision Rifle or “Sniper” video. Now, I know that these videos don’t get a lot of views, like our sexy & exciting videos do. I know sniper rifles are boring. Tough Shit, because our goal is to make all of us better shooters; and to do that, we need to know (and master) the basics.
So, this week’s video will be about the difference between having a Precision Weapon and being Accurate. There is a difference.
Are you an Accurate shooter? Just having a Precision Rifle with Precision Ammo does not make you Accurate. It helps, but it does not ensure it.
So, how do we find out? Again, I know everyone wants videos about sexy new shooting drills that will make them Special Ops Ninjas. Well, not this week. This week, we are going to just do a simple test of you and your gear, using Grouping Drills.
Go out to the 100 or 200 meter line, and shoot a five round group. Take a break, then get down and do it again… and again… and again. Then, go down and check your target. The Standard is to shoot 1 Minute of Angle (MOA). So, at 100 yards, your shot group should be no larger than 1 inch. A good gun should be able to shoot .5 MOA and I have seen many rifles capable of tighter groups than that.
Once you are done measuring and analysing your shot groups; take a hard look at yourself in the mirror and spit it out… Are you are a “Sub-MOA” shooter, or are you a “2 MOA” Shooter? It doesn’t matter to me. What matters is that you learn the limits of you and your equipment. Then, you can go out and strive to improve.
I like to do these drills with ALL my rifles; from shorty AR all the way up to my .338 LapMag AXMC. Especially, right before a long 3-Gun match; I like to double check how well a particular rifle and particular ammo are getting along together. Why waste your time shooting at a 6 inch plate at 500 meters, when you know your setup only shoots 2 MOA?
In this video we also talk about how to read your shot groups, to possibly help diagnose issues that you might be having with your gun or ammo. So, I hope you all get a little something out of it.
I want to give a special “Thanks” to all our Patreon supporters. With their help we are going to be able to step up our video content. So, if you want to help out, please check us out on Patreon.
Besides better videos… How about REAL Training? The Tactical Rifleman crew will soon begin offering open enrolment courses, on a variety of subjects. These courses can be held here, OR we can travel to your location, if you have enough clients and a range/classroom to support the training. So, for those of you that have been hinting about attending a class; start finding like-minded friends, and we’ll be putting classes together soon.
Hope you enjoy. Strength & Honor, TR.
This week, on Tactical Rifleman, we are going to do a brief introduction into the M-249 Squad Automatic Weapon (SAW). Pretty well everyone in the modern US military is familiar with this weapon. It’s used in base defense, mounted on light vehicles, and is the “Suppressing Fire” weapon of all our infantry squads. We aren’t going to bore you with all the statistics. If you want to know the text book maximum effective range, then go to an E-5 Promotion Board. Rather, we are just going to cover Load/Unload/Malfunctions, and then wrap it up with dumping 400rds into a couple illegally parked cars.
I want to give a special “Thanks” to all our Patreon supporters. With their help we are going to be able to step up our video content. So, if you want to help out, please check us out on Patreon.
Besides better videos… How about REAL Training? The Tactical Rifleman crew will soon begin offering open enrolment courses, on a variety of subjects. These courses can be held here, OR we can travel to your location, if you have enough clients and a range/classroom to support the training. So, for those of you that have been hinting about attending a class; start finding like-minded friends, and we’ll be putting classes together soon.
Hope you enjoy. Strength & Honor, TR.
What is the best night vision? what are the best night vision goggles to buy? We will break it all down for you in this video.
Karl is an “Ambassador” for FLIR. So, any of you that are interested in getting a good deal on FLIR or Armasight by FLIR products; please reach out to Tactical Rifleman in the private message section.
Here, at Tactical Rifleman, we are all about showing you how the military “Shoots, Moves, and Communicates.” A big part of shooting and moving in the dark is being able to see. As most of our combat ops are done at night, it only makes sense for us to practice at night, using the best NVDs that the taxpayers can buy.
That said, whether you are military, law enforcement, or civilian; there are certains guidelines that apply.
Match the optic to the mission
Thermals are NOT always better than standard IR
Always get the BEST tube you or your unit can afford
Batteries, batteries, batteries
On this flavor, we are going to do a series of videos about different night vision gear, including GEN-III & Thermal, and both helmet & weapon mounted versions.
This first video is about the dual-tube BNVD that I run on my helmet. It’s a sweet piece of kit, that is actually pretty affordable. The exact model is the Armasight by FLIR BNVD 51 3AG
http://www.armasight.com/night-vision/night-vision-binoculars/armasight-bnvd-51-3ag
Before you ask… Let’s play “I Spy” and I’ll answer a few questions that I know my TR family is going to ask:
Yes, we filmed the “indoor” portion of this video in my “Man Room.”
Yes, that is indeed a picture of Saddam Insane hanging up on the wall over my shoulder. I got it from one of his palaces during the initial invasion of Iraq. He didn’t need it anymore.
See the calendar hanging up next to it? That is a “cameo appearance” by a friend’s calendar company, call “We Love our Guns.” It shows modern firearms being held by models wearing WWII era bathing suits in conservative poses. The cool part is that the outfits are just body painted on to the nude models. Please check out his website, to see more pics and posters available of each model.
Some of you have asked about the military Challenge Coins that are on display on top of the chair rail. They go all the way around the room, and each of them has a story behind it. I’m gonna share a lot of these stories with some of our supporters, on Patreon, but I just don’t have the time here to do it.
There are a lot of pictures and souvenirs, hanging up in this room. I never hung up a single “military” picture in my house the whole time I was active duty. So, maybe a went a little overboard now.
OK, now here’s a question for you… What is the “copper colored circle” on my shelf to the left? Leave your guesses in the comment section below. You know I read all your comments.
Till next time; thanks for watching. Strength & Honor, TR.
Thanks to Leatherback Gear for offering Tactical Rifleman viewers 10% off; just use Promo Code: TACR10. Check them out at http://leatherbackgear.com
Unfortunately, “Active Shooter” scenarios are still very much in the public eye. All schools across our great country are going over their drills, as are public & private businesses and places of worship.
Run, Hide, Bunker, and Prepare to Fight.
Throughout my 26.5 years in the military, I conducted dozens of deployments, in and out of combat zones, in and out of secure areas, and often in “civilian” clothing. Yes, sometimes I ran “fully kitted out” with Level-IV plates (including sides) and a helmet. However, often we had to move around in a “low-vis” uniform, wearing low-profile gear. I would take “non-military” looking bags, and stuff in ballistic plates. It worked well, and didn’t draw attention like a lot of MOLLE Assault Bags will. Anyways, we always wished that someone would make a decent “low-vis” bag that offered ballistic protection.
Fast forward, and enter a new company called Leatherback Gear.
Their bag not only has Level-IIIA Plates, but also zips apart to be worn as a vest, protecting both front and back.
Level-IIIA plate provide protection against most pistol & shotgun calibers. I have to say “most” because there are always exceptions; such as Armor-Piercing rounds and so forth. So, legally, just pistols, not Rifles.
That still covers the fat that 70% of active shooter engagements, in the US are conducted with Pistols.
Well, just like how the “Lawyers” make them error on the conservative side; I wanted to see just how far that liberal application of force could be applied before these Leatherback Gear Bags failed. So, I then shot it with a 5.56mm AR and a 7.62mm AK.
Now, before you all bitch; no I did NOT use Steel-Core AK or Green-Tip AR ammo. Why not? Well, because most active shootings are done by wack jobs, using the crap ammo that they buy on sale. So, I used the most commonly bought plinking ammo I could find. As an example, I used 55gr ball for the 5.56mm.
Honestly, I thought that the doubled-up plates would fail. So, I also added a couple school books and a laptop. Why? Well, because I watch my daughter carry her heavy book bag out the door to school everyday, and I know she is carrying a ton of crap.
Watch the video and I think you’ll agree that I was pleasantly surprised. The doubled up IIIA plates stopped both rifle rounds. Wow!!!
So, I’m pushing a great bag, and am asking you to help me spread the word. If you have loved ones traveling into harm’s way; then, set them up for success.
The team at Leatherback Gear loved the test that we did. So, you guessed it, I hit them up for a “discount code.” Just enter TACR10 on their website and you’ll save 10%.
As always, thanks to MGM Targets for sponsoring the Steel Targets for this video. MGM Targets is offering Tactical Rifleman viewers 10% off; just use Promo Code: TACR10.
Thanks for watching. Strength & Honor, TR.
This week on Tactical Rifleman I want to give you guys a short and sweet brief on what I think potential Navy SEAL candidates can do to get in the correct headspace to successfully survive Basic Underwater Demolition/SEAL training, notoriously known as BUD/S. Make no mistake about it, I didn't realize this stuff when I went. It wasn't until after, when asked how I think I made it through, I realized a few mental principles that helped me through the tough spots. Believe me, that training had plenty of them. Some of these lessons were learned the hard way as my career was far from perfect.
The Navy SEALs have some of the finest individuals I have ever had the honor to fight with, serve with, and learn from. With the proper mindset and maturity, maybe some of you will earn the honor of that service as well. Hoo-ya and good luck!
Thanks to MGM Targets for sponsoring the Steel Targets for this video. MGM Targets is offering Tactical Rifleman viewers 10% off; just use Promo Code: TACR10.
OK, I know everyone has their own opinion on “Home Defense” weapons. Well, that includes me.
Now, you know I don’t mind voicing my opinion and I’m a little “long-winded”, but I ask that you bare with me. My opinion is “Go with what you know.”
If you only practice with a pistol; use that pistol for home defense. If you carry a rifle for a living, then it only makes sense for you to use the same type weapon for home defense. Now you notice that I’ve mentioned a pistol and a rifle. I haven’t said shit about a shotgun. That surprises many of you, because “everyone” on the internet/TV/movies push using a shotgun for home defense.
-It doesn’t go through walls like a pistol
-The “Racking Sound” will scare the intruder away.
-You don’t have to aim
-Better in low light
-The Pump Shotgun will never jam
-Weapon of choice for Zombies
Well, call me crazy, but to me, for Home Defense, I want:
-Accuracy, so I don’t hit friendlies
-Stopping power
-Something that I have “Muscle-memory” with, for ease of use in hasty situations
Shotguns are for breaching doors and shooting birds.
I don’t want to argue here… just watch the video. You’ll see I prefer a Rifle for Home Defense.
You'll notice I mention, for those that suck with a pistol, to also have a spray can of Mace... I got that little trick from a old SF Guy (Thanks Fortin). I can't take credit for that one.
I’m not going to bring just a pistol to a gunfight; I’m going to bring a rifle. Now, before you comment why I carry a pistol EDC; I carry a pistol every day because I am NOT planning on getting into a gunfight. I carry the pistol just in case.
Now, when that home alarm goes off; you can bet I’m coming prepared. I’ll be praying it was nothing. I’ll be praying they wont be stupid… but if they come to hurt my family, rest assured I will exercise my right to spend then next two weeks cleaning up bio-hazard from all over my walls.
A good AR, with a white light and good optic… along with a quality way to secure it safely; that’s all you need. Enough said.
Again, just my opinion. Let the comments and bashing begin.
Thanks for watching. Strength & Honor, TR.
Here at Tactical Rifleman, we are all about showing you new equipment without taking sides over which brand is better than another. Sometimes we do, but rarely. Now, that said, this new Heathen Assaulter Bipod kinda stands out as “the best” because it is the “only” bipod of it’s type that we could find.
So, it is two parts. First is the head, that doubles as a “Barricade Stop.” Second, are the two removable legs. These can store tucked up against the forearm rail, or they can be just tossed in your pack or range bag.
Why would an assaulter need a bipod? First and foremost, to confirm zero on your weapon. Sometimes you show up at the zero range and there are no sand bags or rests; been there a hundred times… got the t-shirt. Additionally, I have often seen SOF guys and Marines trying to get more stable for long-range shots, in the middle of running gun battles in An Najaf and Al Fallujah. Off-hand 175 meters is possible, but get a Marine stable… hell, he can shoot that M16A4 500 meters, easy.
So, if you are a Geardo just looking to be “first” with a new piece of kit, or an Operator just looking to get an “edge” over the enemy; you might want to check out the new Heathen Assaulter Bipod. Again, don’t forget to use the Promo Code TR20 to get 20% off for being a fan of Tactical Rifleman.
Thanks for watching. Strength & Honor, TR.
MGM Targets is offering Tactical Rifleman viewers 10% off; just use Promo Code: TACR10. Check out the Plate Rack in a bucket here: https://mgmtargets.com/plate-racks-dueling-trees/steel-challenge-plate-rack
Here at Tactical Rifleman, we are all about showing you tips, techniques, and new equipment to help you “Shoot, Move, and Communicate.” That includes training gear, like targets. Anyone can print decent paper targets on a standard printer. However, everyone loves to shoot steel. That includes me.
Now, if you rewind a couple of decades, my A-team would often deploy overseas, to shit holes, to teach other countries to fight for themselves, so we wouldn’t have to. These countries didn’t fancy shooting ranges with steel targets. So, we would end up spending your tax payers’ money (thanks by the way) to buy piles of steel knock-down plates to deploy with. These were heavy and didn’t stack well. We always wished we had a couple plate racks, for doing “Man versus Man” competitions (good stressor), but there was no way you could fit a could large plate racks on a Air Force Pallet.
At the NRA Show last year, I stopped by the MGM Booth to say “Hi” to Mike Gibson and his great family. You will not find a better group of Americans anywhere. Anyways, Mike showed me his “Plate Rack in a Bucket.” While it was designed so that any gun enthusiast could now afford a plate rack and could easily transport it; it immediately popped in my head that “these would have been great to deploy with!!!” Operators could literally toss 6 of these cans on your Deployment Pallet, and it would take up no room at all. Then, all you need is three 2 by 4s, and you can find them anywhere on the planet.
So, I asked Mike if I could do a video, to help get the word out to all our war fighters out there, still going down range. Mike even offered all our Tactical Rifleman viewers (that’s you) a 10% discount; just use the promo-code: TACR10 when you go to check out. That’s good for everything on the website.
What’s that?... You’re not a SOF Operator getting ready to deploy? Well, if you like to shoot, but don’t have a good local shooting range that has plate racks; then this Plate Rack in a Bucket is perfect for you too. Drive out into the woods or desert, set it up, and start shooting; much better than shooting beer bottles. These plates are Rifle-Rated Steel too. So, you can get out past 100 meters and bang away on it with your long guns too. Don’t forget to your the Promo Code TACR10, to get your 10% off.
Thanks for watching. Strength & Honor, TR.
So, you have an accurate rifle? Try this drill to see just how accurate YOU are.
I can teach a monkey to shoot targets at 500 meters. As a matter of fact, I HAVE taught monkeys how to shoot accurately. That said, anyone can shoot stationary targets from a prone stable firing position.
We call the “Tactical Rifleman,” because we don’t just focus on target shooting . Rather, we focus on all the skills that today’s operators need to be successful on the modern battlefield. For precision rifle shooting, that means getting out of your comfort zone and shooting from expedient firing positions, under various conditions, and a variety of targets and distances.
So, this video I want to talk about & demonstrate (video, duh) a great drill I’ve put together for making snipers perfect their shooting skills from various heights. Why?
Hunting in the “Global War On Terror” I often found myself and my fellow sniper team shooting from urban hide sites, with shooting loopholes at various heights. We would have to use whatever materials were available, furniture and tables, to build shooting platforms and positions. Well, we hadn’t really practiced this that much back in the states.
The drill is to:
Confirm Zero (Prone)
Confirm Suppressor Zero-Shift (if you run a suppressor)
Shoot Grouping drills from 12 to 72 inches above the ground, in 6” increments.
Record & compare data, to see where and at what heights you need to focus future training.
Now, I’m not saying to do this every time you go out to the range. Hell, I like banging steel plates at 1200 meters as much as the next guy. However, if you get bumped off that UKD Range by another unit and all you have is a 200 or 300 meter range; this is the perfect time to work on grouping drills.
If you are one of those SWAT Snipers that only shoots out to 120 meters (legal issues); then, this would be my NUMBER ONE training drill. You can do this at 100 meters all day long.
I want to give a shout out to Kevin “Coach” Jimmerson, for being my demonstrator. That 6.5mm was a real tack driver. He was shooting .3 MOA groups all day long. I’m a big believer in always trying to learn as much as you can constantly, and I have learned a lot about shooting from Coach over the last few years.
Thanks for watching. Strength & Honor, TR.
This week on Tactical Rifleman, I review the basic setup and components of one configuration of my war belt I utilized in the SEAL Teams. Much like the body armor setup video, the war belt is also not a one-size fits all setup. Team guys set up their kit in a manner that both fits their load bearing requirements and comfort as well as achieving the minimum loadout for their position in the platoon. Now, there is nothing sexy about this setup. Due to the maritime component of SEAL operations, salt water wreaks havoc upon gear. Therefore, the kit I carry is designed for function and is predominately a maritime setup (Visit Board Search Seizure (VBSS)/Zodiac work/Diving, etc.). I use a more high-speed setup when operating in a direct action or land warfare capacity. That means that the kit is a bit nicer and more expensive in order to stand up to a harsh, dryer environment as well as to carry additional ordnance items and communications equipment.
The components on the belt are a bit of a “hodge podge” of different brands of gear; some of it issues and some of it scrounged from the DRMO (recycle) bin (yes, SEALs sometimes have to dive into the “land of abandoned gear” for stuff). The point is, you don’t need all the hyped-up Gucci gear to do work. You just need something durable yet easily replaceable. We put our kit through hell during training evolutions and this rig is a basically the stuff that survived that crucible over the years. The belt itself and pad are Blackhawk. The mag pouches are from my basic loadout package and are of no name brand. They simply Velcro shut when not in use and have a plastic internal piece to keep the mags from sliding around. The large drop (olive drab) pouch is from London Bridge trading and is basically a SAW ammo pouch I use as a large utility bag. The drop-leg holster is from 5-11 and is modular detachable meaning I can swap my Glock 34 holster for my Beretta holster (when training Air Force dudes) pretty easily. The SSE roll-up drop pouch is from Tactical Assault Gear (https://www.tacticalassaultgearstore.com/) which is a veteran-owned founded company all made in the USA. Great stuff! Canteen pouch is Blackhawk. The knife is a SOG SEAL pup. I realize that gear has advanced over the years and the team at Tactical Rifleman have most likely used a variety of these items across the spectrum. Please feel free to leave constructive comments and questions below. Stay violent, my friends!
Air Armor Tech is offering Tactical Rifleman viewers a 25% discount, if you use Promo Code: tacr25 at https://airarmortech.com
Ok, I got that out of the way, because most of you only read the first sentence of my writeup. I spend time writing as much good information down here, under the video, as I cover in the video… sometimes more. So, if you actually read these notes, please let me know in the “comments” section, or I just might quit doing it.
My goal was for this video to NOT come across as a “marketing” video for Air Armor Tech. Part of the Tactical Rifleman core principles is to show “new” and “good” gear that viewers may not have ever seen before. So, when I saw these bags, I thought it was something different and worth sharing.
Gun Bags, really? There are ten thousand different gun bags out there. Most are good, some are great. Why is this one worth showing? This bitch INFLATES.
Great for protecting the Gun (they ran it over with a Hummer)
Great padding for laying on rough shooting ranges or hot roofs
Great for protecting the Gun (they dropped it from a frickin helicopter)
Inflates/deflates really quickly
Did I mention it is really Great for Protecting my Rifle?
Anyways, you know the deal. Check out the video. These gun bags are great but, like everything else that is high quality, they are a little pricey. So, we asked Air Armor Tech to cut our viewers a discount.
I’ll see you in the comments section. Thanks for watching. Strength & Honor, TR.
In this video we cover what I keep in the IFAK, on the back of my Gun Belt. IFAK stands for Individual First Aid Kit. Well, honestly probably because the Army didn’t want to call it a FAK. Just like they didn’t want to call the HMMWV a “Hummer” because it sounds too much like “Bummer.” I digress.
As for everything inside my pouch; I would prefer that you purchase it all from North American Rescue, so there is no chance of you getting counterfeit stuff off of Amazon. I reached out to get part numbers from NAR, but they never got back to me. So, here’s at least a list with links, from Amazon, to at least get you pointed in the right direction…
Soft T wide tourniquet (Keep on your kit where you can reach with both hands)
http://amzn.to/2FlnytH
Nasal Trumpet (you just need one, but sized to you)
http://amzn.to/2ocRMr4
Chest seal
http://amzn.to/2BGoKrJ
14 gauge catheter (only if you know how to treat a Tension Pneumothorax)
http://amzn.to/2HybmX2
Combat gauze (nice to have)
http://amzn.to/2FloOwV
Kerlex (at least 2)
http://amzn.to/2sFjDoF
Ace wraps (at least 2 to hold kerlex in place)
http://amzn.to/2CxuxMY
Duck tape (3 feet rolled tight)
http://amzn.to/2CxQ20e
Yes, you can buy fancy “issue” IFAKs that have tons of extra items. I, personally, take them out to save room. I don’t need First Aid Graphic Cards to tell me what to do. I don’t carry rubber gloves, because if it is one of my buddies bleeding out, I’m not gonna take the time to put them on.
I carry the bare minimum amount of stuff because, if you carry a ton of great gear, your medical kit would be too large and you would leave it in the vehicle or team room. My basic IFAK stays with me, and I carry extra med gear on the back of my body armor. We also carry a much larger Medic Bag in every vehicle.
Ensure that you can reach your IFAK with both hands. Otherwise, try to guess which arm will get injured. Murphy is a bitch.
Of Course, the dedicated unit medics or PJs carry much more medical gear in their Trauma Bags. Depending on the mission or situation, some units ever deploy with whole medical teams. It’s all about having the gear to take the most advantage of that first Golden Hour.
That said, you can’t rely on that unit medic or local EMS to come save the day. Life saving starts with First Aid. That’s you, that are standing right there when it happens. So, have the gear to get it done.
If you haven’t already, I encourage EVERYONE to attend a modern medical course, such as a Tactical Combat Casualty Care Course (TCCC). T1G offers these great classes. You can sign up for these at T1G.com
Thanks for watching. Strength & Honor, TR.
In this video I want to cover a couple simple training drills. First will help you determine if a student has a flinch. The second drill will help you break that flinch.
Why do new shooters flinch? Well, they are scared of the gun. Not so much the recoil in their hands, but rather the overpressure concussion of that shock wave hitting them in the face. For some, maybe Daddy started them off at 10 years old shooting a double-barrel 12 gauge. For others, maybe they had poor hearing protection. Don’t laugh at them, because I can put you behind a Barrett .50cal (with the muzzle brake removed) and after a dozen rounds, your body wont be wanting you to pull the trigger either. Whatever the cause of the flinch; first you have to identify it, then you have to eliminate it.
Most shooters don’t flinch when they are just dry-firing, because their subconscious mind knows that they aren’t going to get slapped in the face by a loud shock wave. Also, you can’t really see a flinch while someone is shooting live ammo. That’s where Dummy Rounds come in. They work great for surprising that shooter. They think they are going to get popped. Then, when they hit the dummy round, that you hid in their magazine, they jerk the living hell out of the firearm.
Once you have identified that the shooter has a flinch; try to take away as much of the cause as possible. Use double ear pro. Use good wrap around glasses or even goggles. Use a pistol with a smaller caliber or lighter loads. A 44 magnum is not the best pistol to start out your 12 year old daughter on.
One of my favorite drills for fixing a Flinch, is called “Alternating Ball & Dummy.” Every other round is a dummy round and the shooter knows it. I even remind them. My thought process is that, even though they flinch on every live round, they are not flinching on the dummy rounds. Their subconscious mind is at least seeing what “correct” looks like 50% of the time (when they are shooting the dummy rounds). After a while, they relax, and the subconscious mind begins to flow with the line that they know is correct. It works. It might take a few magazines, but it does work.
So, the next time you are out at the range with a new shooter that is missing terribly; instead of just bashing them, give them some constructive criticism. Help them identify if they have a flinch. They might not even know it. Then, if they do, try my “Alternating Ball & Dummy” Drill to help them break the habit.
Thanks for watching. Strength & Honor, TR.
In this video we cover Slings that the US military uses on their Battle Rifles.
Here, at Tactical Rifleman, we really do read the comments. Most of them are total jackassery; but every now and then one of you will ask a legitimate question or have a request for a video. We do our best to answer all of these. If you ask a good question and we don’t answer it; it’s probably because we have ALREADY ANSWERED the SAME QUESTION a dozen other times (often on the same video). That said, we do get questions that warrant a little more than a two sentence answer.
I common question is “What kind of Sling is on your Rifle?” or “What do you think of blaa blaa blaa Sling?” So, hence, here is your “Sling” video.
First, up front, I’m not gonna tell you what kind of Sling mine is (but I think it is ATS), because I hate pimping one brand over another. There are lots of great companies out there that are all putting out great gear. I don’t want to get one brand or another mad at me. All I ask is that you try to use quality gear by a reputable company. Stay away from all the counterfeit shit coming out of China.
Next, I want everyone to understand that I don’t carry “this” or “that” just because it is “sexy” or politically correct. Rather, I carry what I think is the best piece of kit for the current situation. Slings are a perfect example of this. I started carrying a Leather Sling on my first M-21 sniper rifle, because that’s all I had and that was what I was taught to shoot with. I used a 2-point short black nylon sling on my M-16 because that’s what we were issued. It sucked; so we cannibalized into the first 3-point slings, and they have since continued to morph into the slings you see used today.
I won't pimp single point versus multipoint slings. They all have strong points and weak points. Educate yourself and choose what works best for you in your situation.
Thanks for watching. Strength & Honor, TR.
In this video we cover how Snipers train to shoot moving targets.
First, you have to determine your “Lead.” That’s based on “Time of Flight” and the “Speed” that your target in moving.
Second, you have to master the techniques for cracking that sear so your bullet arrives at the same place as your moving target. We cover the two techniques of Tracking and Ambush. Both techniques work well and each have advantages and disadvantages.
The Ambush technique is the most common one used by Snipers in school, because it allows the shooter to set up a stable firing position. The targets are at a set speed and don't change direction unannounced. This makes for accurate shots and high scores on tests. It is easily the most accurate technique for shooting movers.
However, in real life, breathing targets often wander around and change gait and direction, which may screw a shooter using the Ambush technique.
Which brings us to our second technique for shooting movers, which is Tracking. This requires the shooter to move his weapon with the movement of the target and then break the trigger when the sight picture is at the correct lead. This is less accurate, because the shooter is moving rather than being in a static stable firing position.
I prefer the Tracking technique for shooting on a count down. What am I talking about? Imagine your sniper team is supporting a hostage rescue assault. Snipers are hidden, assaulters are at breach points and there are several enemy sentries walking around. Now, the whole assault is going to go down off of a count-down on the radio. All snipers have to shoot at the exact same time, otherwise the first bullet crack would alert the rest. Now, because of this, you can't guarantee that the sentry will be at your Ambush point right on the count-down. So, you have to move the crosshairs with him, which is using the Tracking Technique.
I hope you enjoy the video. I enjoy teaching and filming the sniper subjects. I know it’s not “sexy”; so we wont get a lot of “Views.” That’s fine. I hope some of you learned a little something; and that’s what it is all about. Thanks for watching. Strength & Honor, TR.
Help support Tactical Rifleman by purchasing one of our T-shirts, check them out at: https://shop.spreadshirt.com/Tacticalrifleman/
Thanks for watching. Strength and Honor, TR.